

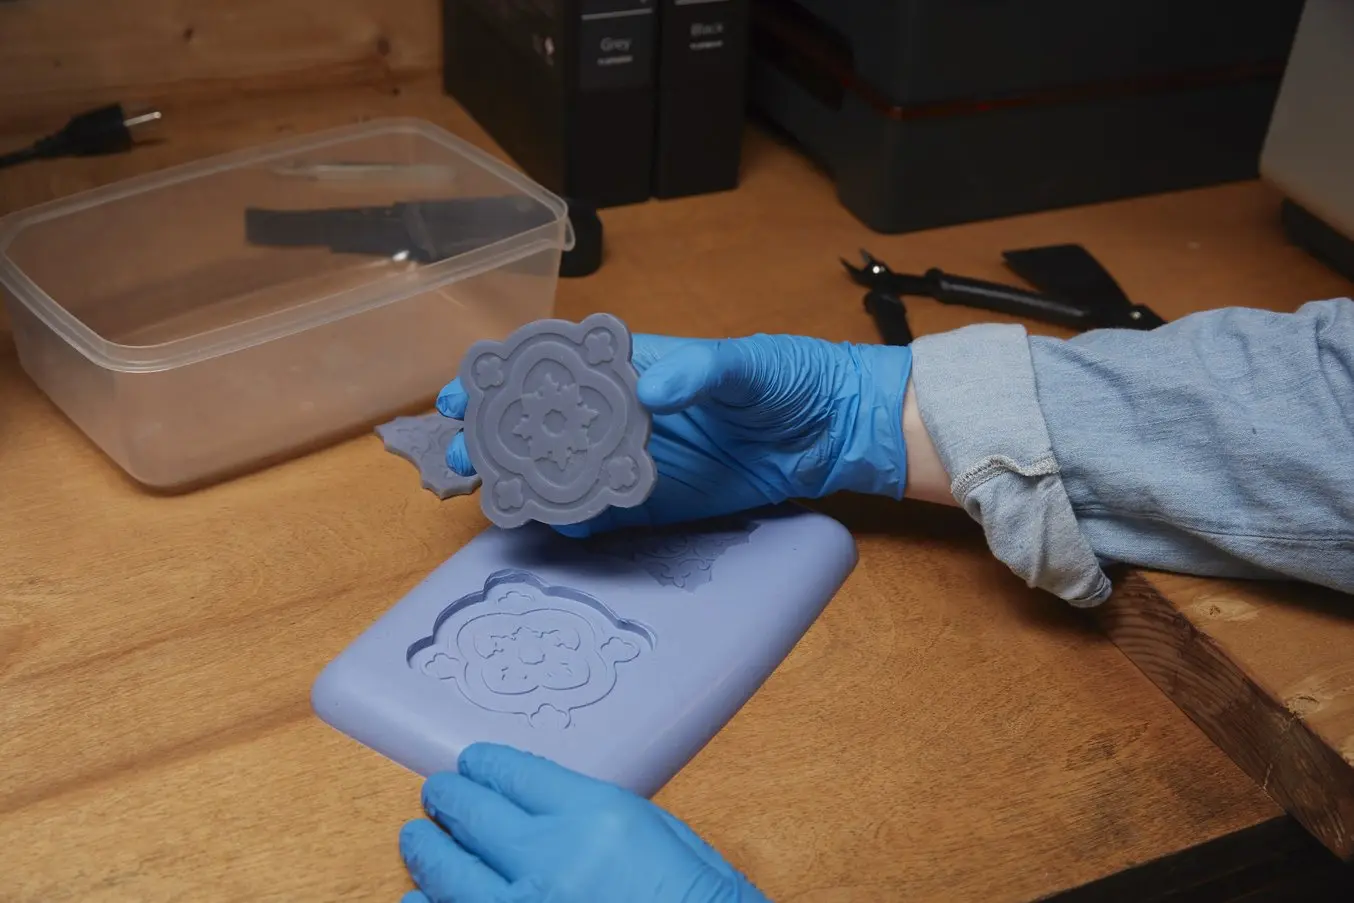
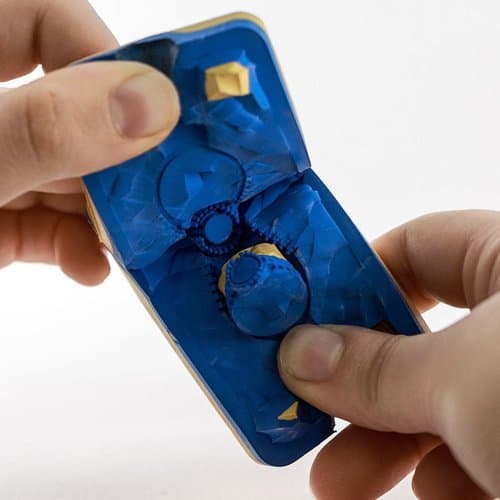
How To Repair A Silicone Mold
Throughout history, artisans have used molds to brand everything from Bronze Age weaponry to mod-day consumer products. While early on molds were commonly shaped in stone, modern science has given rise to materials that are far easier to work with, such every bit silicone.
Today, a vast array of industries rely on silicone molding. Product developers, engineers, DIY makers, and even chefs all make silicone molds to create one-off or smaller runs of parts.
In this practical guide to silicone mold-making, nosotros'll break downwards everything you demand to know before getting started, provide a list of items you'll need, and give you a step-by-step guide for incorporating silicone molds into any type of project.
White Newspaper
Download this written report for case studies featuring OXO, Tinta Crayons, and Dame Products that illustrate three dissimilar implementations of silicone molding for product blueprint and manufacturing, including overmolding and insert molding.
Download White Paper
Silicone is a strong choice for mold-making because it offers such a diverse array of benefits. You tin can hands create custom designs using silicone molding. The molds themselves are also quite durable, so you can utilize them repeatedly without fear of breakage. Silicone's inorganic makeup—compared to prophylactic, its organic counterpart—makes it highly resilient to heat and cold, chemical exposure, and even fungus. Some of the benefits of silicone molds include the post-obit:
Silicone's flexibility makes it like shooting fish in a barrel to work with. Silicone molds are pliable and lightweight compared to stiffer substances similar plastic and they're besides easier to remove once a part is fully formed. Thanks to silicone'southward high level of flexibility, both the mold and the fabricated part are less likely to break or chip. You tin apply custom silicone molds to shape everything from circuitous engineering components to holiday-themed ice cubes or confections.
Silicone withstands temperatures from -65° to 400° degrees Celsius. Additionally, information technology tin accept an elongation of 700%, depending on the formulation. Highly stable nether a broad range of conditions, y'all can put silicone molds in the oven, freeze them, and stretch them during removal.
In most cases, you'll go many runs out of a silicone mold. However, it's important to note that the life span of molds can vary greatly. The more oft yous bandage, and the more complex or detailed your pattern, the faster your mold might degrade. To maximize the life of your silicone molds, clean them with mild lather and water, dry them thoroughly, and shop them flat without stacking.
While there are a lot of benefits to working with silicone, there are also a few limitations to exist aware of:
-
Silicone costs more than than latex and organic rubbers. A quick comparison on Amazon shows a gallon of silicone regularly topping $100—almost twice as much as latex.
-
Though it'due south flexible, silicone can tear if stretched as well far.
-
Not all silicone is formulated every bit. Always purchase silicone and whatever manufacturing materials from a reputable supplier.
Hobbyists and professionals alike rely on silicone molds because of their versatility and ease of use. Here are a few examples of industries and applications that make silicone molds to produce their products:
Silicone molding is used in prototyping and product evolution production beyond a wide range of industries. Because the cost for silicone molds is essentially lower than hard tooling for traditional manufacturing processes like injection molding, casting in silicone molds is ideal for prototyping production designs also as creating beta units for testing the marketplace and consumer response to a new product. While 3D printing is better suited for creating one-off parts speedily, silicone molding and urethane casting tin exist ideal for smaller runs of parts.
Webinar
Bridge production is faster than traditional manufacturing methods and is useful for products where the volumes are depression or the pattern may need to change. Lookout man this webinar to acquire how to switch from 3D press to mid vol casting to injection molding.
Watch the Webinar
Jewelers use custom silicone molds to duplicate paw-carved or 3D printed patterns in wax, assuasive them to stage out the time-consuming labor of creating wax-carved patterns for each new slice, but still go on to cast from wax. This offers a major jump in series production, making it possible for investment casting to work at scale. Because silicone molds capture a fine level of detail, jewelers can produce pieces with ornate details and intricate geometries.
An RTV (room-temperature-vulcanized) silicone mold formed around the 3D printed master.
White Paper
3D printing with high-operation materials allows designers and casters to leverage digital applied science in their production processes. Read now to learn how 3D printing can exist used in the production of small metal parts.
Download White Paper
Creators use silicone molds to brand many custom crafts such as soaps and candles. Fifty-fifty manufacturers of schoolhouse supplies often employ silicone molds to class items such as chalk and erasers.
For case, Tinta Crayons, a small-scale Australia-based visitor, uses silicone molding to industry crayons with playful shapes and high surface detail.
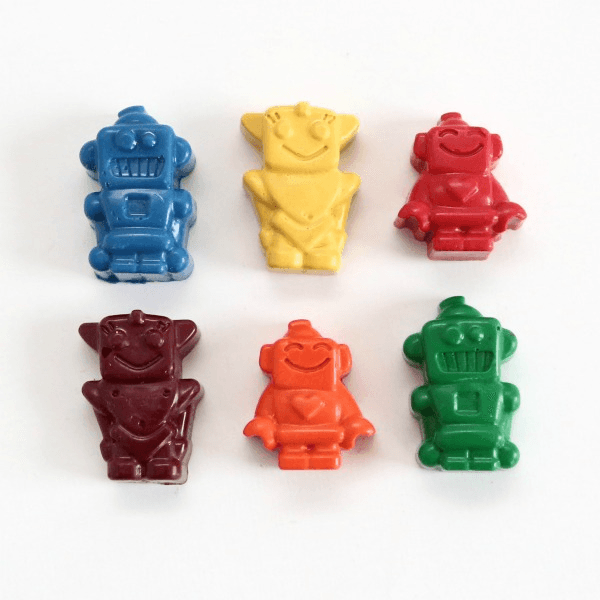
Silicone-molded robot crayons from Tinta Crayons. (Image Source)
Food-grade silicone molds are used to grade all sorts of whimsical confections, including chocolates, ice pops, and lollipops. Since silicone can handle oestrus up to 400° degrees Celsius, molds can exist used in cooking, besides. Pocket-size baked goods such as muffins and cupcakes rising nicely in silicone molds.
Contained artists and DIYers frequently apply silicone molding to craft unique creations. You can utilise silicone molds to class or replicate everything from bath bombs to dog treats—the possibilities are nearly endless. A fun silicone molding project for kids is to create a lifecast of their hand. Just make sure you choose a skin-rubber silicone.
A pattern—sometimes referred to every bit a master—is the part you use to create a precise negative in your silicone mold. If you lot are only trying to replicate an existing object, it might make sense to utilize that object as your pattern. You'll just need to be sure that the object can withstand the mold-making process.
To create a new design or prototype, you must first fabricate your blueprint; you have several options for this. Here are a few ways to make patterns for silicone molding:
-
Sculpting – If you lot're a talented sculptor or if yous're creating a relatively unproblematic pattern, you can utilize dirt to create a pattern. Sculpting a blueprint is also a fun project for kids and a cost-effective pick for DIYers.
-
Etching – You tin make your pattern out of wood. Carved wood masters are an excellent selection for making tiles and flat designs.
-
3D printing – Many professionals and commercial designers choose to 3D print patterns. Desktop 3D printers offer many benefits, including design flexibility within CAD software, high accuracy, ease of prototype modification, and quick turnaround times.
Once you have a pattern, you tin can get started with making your silicone mold.
Here's everything you'll need to build a basic silicone molding kit:
-
A master blueprint
-
Liquid silicone, such equally Polish-On OOMOO 30
-
A box or nonporous container for the mold housing
-
Mold release, such equally Smooth-On universal mold release
-
Wax, resin, or other end-use material
Earlier you offset making your molds, you lot'll demand to decide which type of mold(s) you want to create.
Jumpsuit silicone molds are like ice cube trays. You fill the mold and and so let the material fix. However, but as an ice cube tray creates cubes with a apartment top, jumpsuit molds volition only work with designs that accept a flat side. If your master has deep undercuts, that also makes it harder to remove it and the finished parts from the mold in one case the silicone sets without damage.
When these are not a business concern for your pattern, a one-piece silicone mold is an ideal manner to create a seamless 3D reproduction of your master on all of its other surfaces.
Jumpsuit silicone molds are ideal for designs that take a apartment side and no deep undercuts.
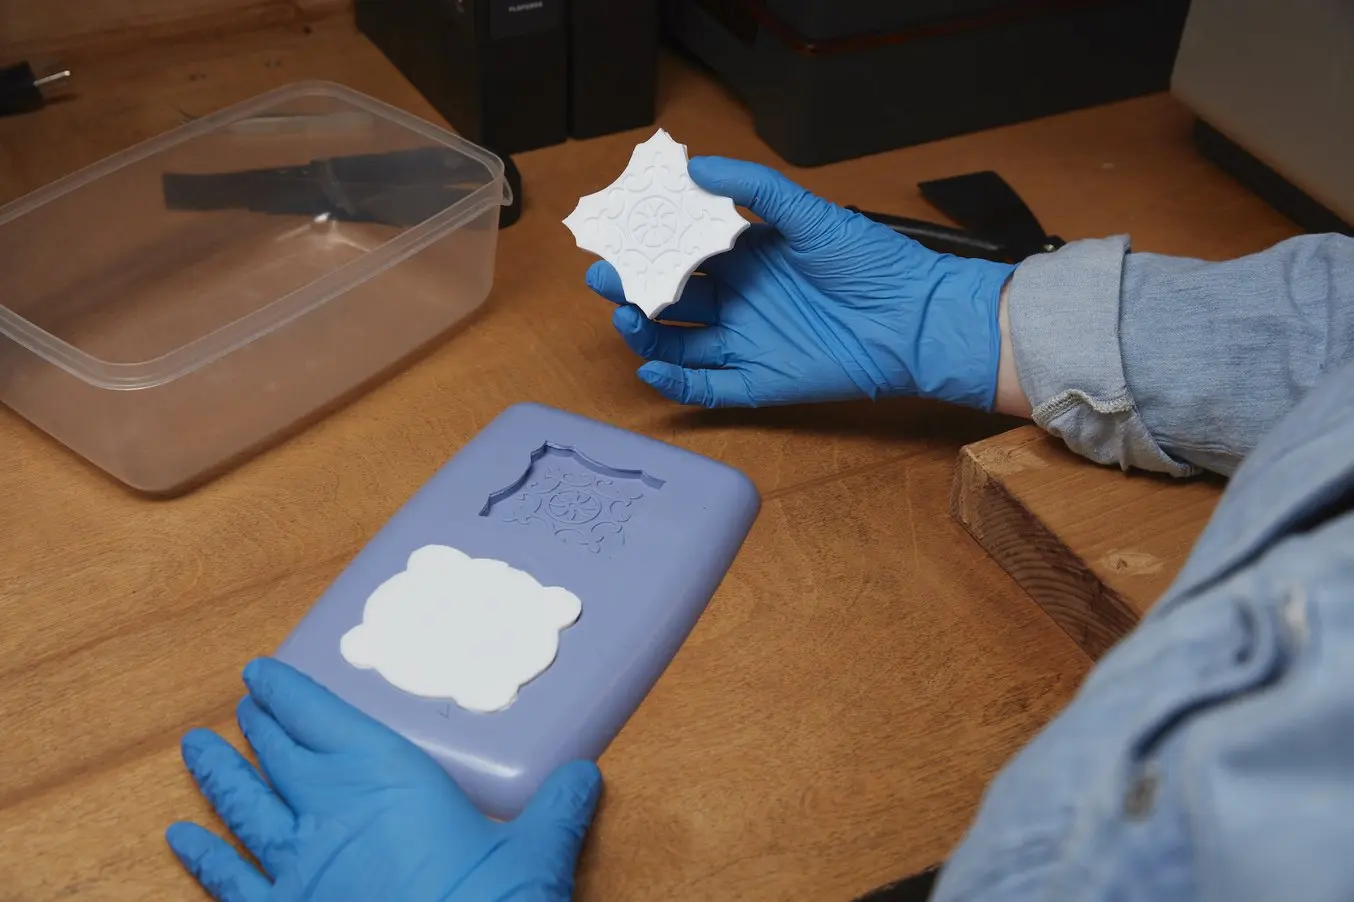
A two-piece silicone mold is improve for reproducing your 3D primary without a flat side or has deep undercuts. The mold splits into two pieces that join back together, forming a fillable 3D crenel (similar to how injection molding works).
Two-piece molds leave no flat surfaces and are easier to piece of work with than single cake molds. On the downside, they are a flake more complex to create and seams may form if the two pieces aren't perfectly affluent.
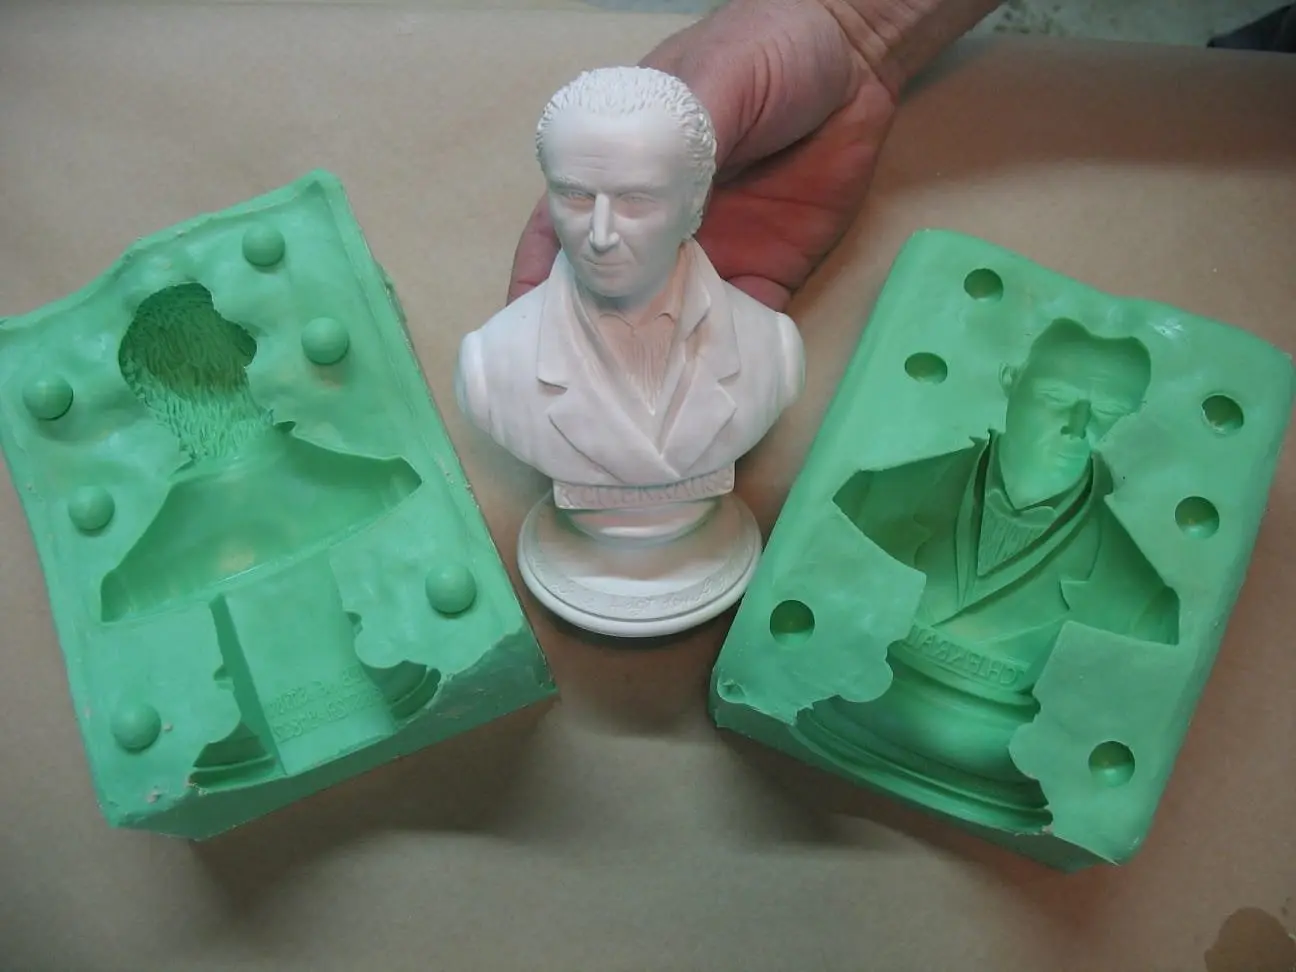
2-piece silicone molds tin can reproduce any principal design. (image source)
Kickoff, you'll need to decide if you want to employ a one-piece or two-slice mold. The processes for making these molds are similar, simply it will have a flake longer to create a 2-part mold. You tin can use the following step-by-footstep instruction to create your own silicone molds.
-
Create your production primary:This is your final part design, which volition be replicated in some other material. When 3D printing on a stereolithography (SLA) 3D printer, employ whatever Standard Resin with a layer meridian of 50 microns. Keep the detailed surface complimentary of support marks. Launder the parts thoroughly with IPA—any rest tackiness on the surface can bear on the silicone molding process.
-
Construct the mold housing:Coated MDF is a popular choice for amalgam a containment box for the silicone mold, but fifty-fifty a elementary premade plastic container will practice. Await for nonporous materials and a flat bottom.
-
Lay out the main and apply mold release:Start past lightly misting the within of the mold housing with mold release. Tile the masters inside the box with the detailed side up. Lightly spray these with mold release as well. This will need well-nigh x minutes to dry thoroughly.
-
Fix the silicone:Mix the silicone rubber according to the bundle instructions. You can apply a vibrating device like a handheld electric sander to remove air bubbles.
-
Pour the silicone into the mold housing:Gently cascade the mixed silicone prophylactic into the containment box in a narrow stream. Aim for the lowest office of the box first (the base) and gradually come up up the contours of your 3D printed main. Cover it with at least one centimeter of silicone. The curing process will take from one hour to one day to complete, depending on the silicone type and brand.
-
De-mold the silicone:When curing is consummate, peel the silicone out of the containment box and remove the masters. This will serve as your water ice cube tray-style mold for casting your end-use product.
-
Bandage your office:Once more, it's a good idea to lightly spray the silicone mold with mold release and let it dry for 10 minutes. Pour your end-use material (wax or concrete, for example) into the cavities, and allow to cure.
-
Prepare the mold for the side by side casting:You can use this silicone mold multiple times. Return to step seven to repeat the process.
To create a two-part mold, start by following the first two steps above, which include creating a main and constructing the mold housing. After that, follow this process to create a two-part mold:
-
Lay out the masters in clay:Employ the clay to grade what volition eventually be one half of your mold. The clay should exist placed within your mold housing with half of your master sticking out of the clay.
-
Fix and pour your silicone:Follow the package instructions included with your silicone to prepare and gently cascade the silicone into your mold housing on top of the clay and your masters. This layer of silicone will be one one-half of your 2-piece mold.
-
Remove everything from the mold housing:In one case your start mold has cured, y'all'll demand to remove the silicone mold, masters, and clay from the mold housing. It'southward okay if the layers separate upon extraction.
-
Make clean away the dirt:Clean all of the clay away to reveal your first silicone mold and masters. Make certain your masters and your existing mold are completely clean.
-
Place the mold and masters back in the mold housing:Insert both your existing silicone mold and the masters (laid in the mold) back into the mold housing facing upwards instead of downward.
-
Apply release agent:Apply a thin layer of release amanuensis to the acme of your primary and existing silicone mold to make de-molding easier.
-
Prepare and pour the silicone for your second mold:Following the same instructions as before, set and pour the silicone into the mold housing to create your second mold.
-
Expect for your second mold to cure:Let plenty of fourth dimension for your second mold to cure before attempting to remove it from the mold housing.
-
De-mold your parts:Remove both silicone molds from the mold housing and gently pull them autonomously.
At the end of the day, there'south no ane right fashion to make products, whether they're nutrient, figurines, or commercial components. Various product methods are often used together to achieve the best results; agreement all of their unique advantages and disadvantages will help you make the best decisions for your projection.
Want to discover more techniques and applications for silicone mold-making? Download our Silicone Molding for Product Design white paper.

Source: https://formlabs.com/blog/how-to-make-silicone-molds/
Posted by: jonesdidepubse.blogspot.com
0 Response to "How To Repair A Silicone Mold"
Post a Comment